IoT Working Bench – Where the ideas materialize.

What is so amazing about IoT ?
You can get started easily with very little budget to work with microprocessors, single-board-computers and all kinds of electronics, like sensors and more. For the standard kits we discuss here there, lots of online documentation, books and web-sites are available, even interested people with very little IT or electronics knowledge or students at secondary schools can get some hands-on with easy projects.

With a simple workbench, you can do prototyping and evaluate before you even consider going in series, or maybe just build a dedicated one-off device.

Microprocessor and SBC

ESP32

The ESP32 SoC (System on Chip) microcontroller by Espressif is the tool of choice aiming for a small footprint in terms of size (the chip itself measures 7x7mm), power consumption and price. It supports a range of peripherals, I2C, UART, SPI, I2S, PWM, CAN 2.0, ADC, DAC. Wifi 802.11, Bluetooth 4.2 and BLE are already onboard.

The benefits come with limitations though, the chip is operating at 240Mhz and the memory counting in KiB (320 KiB RAM and 448 KIB ROM). Memory consumption has to be designed carefully and a conservative approach towards running the device in various live and sleep modes, it can consume as little as 2.5µA (hibernation) but can draw as well 800mA when everything is running in full swing with Wifi and Bluetooth enabled. The ESP32 and its variants teach you proper IoT design. You can buy the ESP32 as NodeMCU Development Board for less than Euro 10,-.

Arduino

The Arduino history goes back to 2005 when it was initially released by the Interaction Design Institute Ivrea (Italy) as electronics platform for students. Released into the wild as open source hardware for over 15 years, there is a huge user community, plenty of documentation and projects ready to replicate.

The Arduino, even somewhat similar to the ESP32 (Arduino being not as powerful, slower and less memory than the ESP32), is more beginner friendly. The coding is done with sketches (C language) uploaded to the device via USB, logic similar to Processing.

If your project has anything to do with image, video or sound capturing, the Arduino (and the ESP32) is not the right choice, choose the Raspberry Pi as the minimum platform.

The Arduino has a price tag between Euro 10,- to 50,- depending on the manufacturer and specs. For education purpose you find it packaged together with sensors and shields for basic projects.

Raspberry Pi

The Raspberry Pi (introduced 2012) is the tool of choice if you need a more powerful device that runs an OS, can be connected to a screen, supports USB devices, provides more memory and CPU power and easy-to-code features. Connected to a screen (2x HDMI) it can serve as a simple desktop replacement to surf the web, watch movies and do office jobs with LibreOffice for regular user profile.

The current Raspberry Pi 4 ranges between Euro 50,- to 100,- (inclusive of casing and power supply).

Edge or ML Devices

These devices are similar to the Raspberry Pi platform in terms of OS, connectivity, GPIO’s etc, but leaning more towards serious data processing ML inference at the edge.

NVIDIA Jetson

NVDIA launched the embedded computing board in 2014 and has released several new versions since then. The current one is the Nano 2GB Kit, purchase it for less than Euro 70,-. Together with all the free documentation, courses, tutorials this is a small powerhouse which can run parallel neural networks. With the Jetpack SDK it supports CUDA, cuDNN, TensorRT, Deepstream, OpenCV and more. How much cheaper can you make AI accessible on a local device? More info at NVDIA.

Coral Dev Board

The single-board computer to perform high-speed ML inferencing. The local AI prototyping toolkit was launched in 2016 by Google and costs less than Euro 150,-. More info at coral.ai.

Sensors

There is a myriad of sensors, add-ons, shields and breakouts for near endless prototyping ideas. Here are a few common sensors to give a budget indication.

Note (1): There is quite a price span between buying these sensors/shields locally (Germany) and from the source (China), it can be significantly cheaper to order it from the Chinese reseller shops (though it might takes weeks to receive the goods, and worse you might spend time to collect if from the customs office).

Note (2): Look at the specs of the sensors/shields you purchase and check the power consumption (inclusive of low power or sleep modes) and the accuracy.

GY-68 BMP180Air pressure and temperature.
SHT30Temperature and relative humidity.
SDS011 Dust Sensor (PM2.5, PM10)
SCD30 CO2
GPS Geo positioning using GPS, GLONASS, Galileo
GY-271 Compass
MPU-6050Gyroscope, acceleration
HC-SR04Ultrasonic sensor
The authors IoT Working Bench

Some devices on the above image: Raspberry Pi4B, Arduino (Mega, Nano), Orange Pi, Google Coral Dev Board, NVIDIA Jetson Nano, ESP32, plus a few sensors/add-on’s like Lidar, LoraWan, GPS, SDS30 (Co2), BMP 180 (Temp, Pressure), PMSA0031 (dust particles PM2.5, PM10), microstepper motor shield.

What else do we need ?
Innovative ideas, curiosity to play, experiment, willingness to fail and succeed with all kinds of projects.
A 3D printer comes in handy to print casings or other mechanical parts.

Next Steps
The step from prototyping in the lab to the mass-production of an actual device is huge, though possible with the respective funding at hand. It makes a big difference to hand-produce one or a few devices that you have full control over and manufacturing, shipping and supporting 10.000’s devices as a product. You have to cover all kinds of certifications (e.g. CE for Europe) and considerations to design and produce the device by a third party (EMS).

Another aspect is the distribution of IoT devices on scale. A device operating in a closed environment. e.g. consumer appliances that solely communicate locally does not require a server backend. Certainly devices deployed at large, e.g. a fleet management system or different type of devices, it is recommended to use one of the IoT platforms in the cloud or locally (AWS, Microsoft, Particle, IBM, Oracle, OpenRemote, and others).

Stay tuned..

Taming the beast – Some GPU benchmarking

Resuming with the setup and benchmarking of the RTX 3080TI. After the initial basic 3D rendering FPS-tests, time to get the hands dirty with some ML tests. Before trying to benchmark the GPU, we need to get the required Tensorflow packages and NVDIA toolkits up and running under Windows.

For this setup we assume we have Windows 10 and we will use PyCharm as our Python IDE.

The required NVIDIA basic ingredients :

  1. Download and install the latest driver for the GPU from the NVDIA download. The CUDA toolkit requires a minimum driver version (more info).
  2. Download and install the CUDA toolkit (link) (at the time of this post, version 11.6)
  3. Download and install the cuDNN library (link). Beware, there is a dependency between the versions of cuDNN and CUDA. I was not able to make the latest version of both (cuDNN 8.3.1 and CUDA 11.6) to work for our Tensorflow setup.
    Download the latest 8.1.x version of cuDNN instead.

Following the official installation guide (adding the insghts from some blogs and forums), we still have to make some manual changes to our system.

  • Copy relevant library files from the cuDNN zipfile content to the respective CUDA path folders.
  • Ensure the relevant path are setup in the Windows system settings for environment variables.

With this we can start PyCharm, create a project and embedd the Tensorflow packages. If you choose a different method, make sure you use virtual environments, the packages sum up to up to 2GB coming with their potential dependency problems interfering with other projects in case you share packages.

Lets pip-install the Tensorflow-GPU package and check if the GPU is found.

import tensorflow as tf

tf.config.list_physical_devices("GPU")

if tf.test.gpu_device_name():
    print(tf.test.gpu_device_name())
else:
   print("No GPU.")

gpu_devices = tf.config.list_physical_devices('GPU')
if gpu_devices:
  details = tf.config.experimental.get_device_details(gpu_devices[0])
  print(details)

We also can install some of the basic ML packages and verify them.

import sys

import tensorflow.keras
import pandas as pd
import sklearn as sk
import tensorflow as tf

print(f"Tensor Flow Version: {tf.__version__}")
print(f"Keras Version: {tensorflow.keras.__version__}")
print()
print(f"Python {sys.version}")
print(f"Pandas {pd.__version__}")
print(f"Scikit-Learn {sk.__version__}")
gpu = len(tf.config.list_physical_devices('GPU'))>0
print("GPU is", "available" if gpu else "NOT AVAILABLE")

The final step would be to perfrom some kind of ML benchmark performed by the GPU. Doing a quick search I found only one easy applicable solution at the website ai-benchmark.com. Unfortunately, the page, created by some people from the CV Lab at the ETH Zurich, is no longer maintained (no current cards in the rating list). We still can use the package and do a basic scoring.

Comparing, by running the same test, the RTX 3080TI with the CPU AMD Ryzen 1700 (left side in the screenshot).

This provides some order-of-magnitude but hard to say if this a proper proper approach.

More real hands-on exercises will come up soon. Stay tuned..

Unleashing the beast – Paving the way to the Omniverse

Looking back at 30 years of experiencing firsthand the (graphics) hardware (r)evolution, it is thrilling to enjoy such a high level of realtime rendering quality, high resolution and performance, available today. My career literally started off in the era of 256KB VGA graphic adapters (operating with bit block transfer), moving from 320×240 and 640×640 to SVGA 800×600. Some of you remember brand-names like S3, ATI, Diamond and others, 25 years back when a 80486DX motherboard had 6x ISA expansion slots for a variety of sound/network/xyz adapters (now down to a single PCIe slot for the GPU).
Today the battle is fought between AMD and NVDIA. The evolution never stopped, I tagged along investing in newer display adapters over the years. Since the late 2000s I stick to NVIDA starting with GeForce 200 Series (GTX 260) and GeForce 10 Series (GTX 1060) and now getting my hands on a real graphics powerhouse.

I managed to purchase a RTX 3080TI. I skip the discussion of the current problems of the industry to produce and ship sufficient parts and the attached price development.
Released in June 2021, running on the Ampere microarchitecture, supporting DirectX 12 Ultimate, 12 GB of GDDR6X memory, using 10240 cores, theoretical pixel rate of 186 GPixel/s and 34 TFLOPS FP32 (complete specs here and here), this card is quite a power-house, only the 3090 being more powerful in this line (3090TI announced in Jan 22, but both unobtainable and most likely absurdly expensive).
Comparing the 3080TI (unfairly) with my 13-year-old GTX 260, released in 2008, reveals the order-of-magnitude in Moore’s law. Running only 896 MB memory, 192 cores, 16 GPixel/s, 0.48 TFLOPS FP32. If this makes any sense to compare, the RTX 3080TI would outperform the GTX 260 by ~3000% (link).
Fun fact, architecture name line-up since 2008: Tesla, Fermi, Kepler, Maxwell, Pascal, Volta, Turing, Ampere.
The RTX 30 series is targeting the high-end gaming consumer market, but its specs are close enough to the GPU workstations and data centre GPU’s, to serve personal research usage at home. Unfortunately, the RTX 30 series is still very much in demand by the everlasting Bitcoin and Etherum mining ratrace, LHR was supposed to defer the usage for mining purposes, though it seems the miner community found ways to bypass the protection (source).

After some further upgrades, inclusive of power supply update (850W to be on the safe side) and more SSD and M2 disk space, the rig is ready for a first performance test using 3DMark running Time Spy.
(Top Score in the hall of fame with a single GPU is 28473 at the time of writing)

I am setting up some test scenarios with Tensorflow to run on the GPU. Will discuss this in another post.

Eventually all up and running, I managed to do my first steps in the Omniverse, get to know the concept, the components and plugins. There is plenty to learn and experiment with, all for free.

NVDIA Omniverse Launcher

Will keep you posted about my adventures in the Omniverse. Especially interested in the context of Digital Twins. Stay tuned..

#RetroTech; 80s Home Computer again

I have fond memories of my first steps into computing in the 1980s, when home computing took living and study rooms by storm. For the first time, computing became widely accessible and affordable for everyone. I have only one original device at hand, so we will explore alternative retro options to go down the memory lane and also visit some of the other home computing platforms. The retro craze goes through various technology trends, people start to value music played by HIFI LP player and pictures taken by analog photography equipment again, others collect old computing equipment and video games consoles. The market reacts to this demand and you can re-buy the old technology again (usually packing emulators on modern chipsets into the old casings), like Sony was relaunching the PS1, Nintendo the NES or Atari the 2600 console. Prices for authentic old equipment are raising too (recommended NY Times article). In this post we will have a look at the Commodore C64.

Relaunched Commodore C64 in original case

First things first, you do not need to buy any equipment for a brief visit to the home computing past, all can be done in the browser or with emulation tools on any regular notebook or Raspberry Pi. The Commodore C64, my first own computer in 1984, I sold 1991 to finance my first IBM comp. PC. But with all the nostalgic memories attached to it, I bought a retro set from Retro Games Ltd., for roughly Euro 100,- (see above image), just for the sake of the physical look and feel of it (Note, no Commodore logo or trademark used, which was sold and passed on multiple times until today). You could achieve the same by installing RetroPie, which can almost any home computing and game console of the 80s and 90s.

The Sinclair ZX81

Before looking at the C64, a quick look at the Sinclair ZX81, which I temporary used (borrowed from a schoolmate) for about a year and to do my first computing explorations. This device was released in 1981 by Sinclair Research, a very basic device coming with 1KB (!!!) memory, a Z80 CPU at 3.25Mhz, running Sinclair Basic and supporting only a 24 x 36 character monochrome screen resolution (using a regular TV set). Everything-included-in-the-box and the user input was nothing but a pressure-sensitive membrane keyboard. An absolute nightmare for any serious typing, not to say development, but it was the only thing at hand.

Image by Evan-Amos – CC BY-SA 3.0

It did support an external add-on 64KB memory adapter, a cashier-style small printer and the only way to load and store programs was on regular audio tapes at 250bps. If you are keen to give it a spin, drop by this website.

3D Monster Maze by Malcolm Evans in 1981

There was no way to compile applications, so all the commercial tools and games came automatically as open source.

ZX81 Basic Source

The Commodore C64

The famous blue launch screen and the command to start the first app on the disk

The Commodore 64 (aka C64, CBM 64) was definitely THE home computing device of the 1980s. By far the biggest number sold compared to similar devices in the market.

Several extensions and additional hardware made the device quite universal, even allowing non-gaming activities like text processing.

A few software Highlights

Microsoft Multiplan

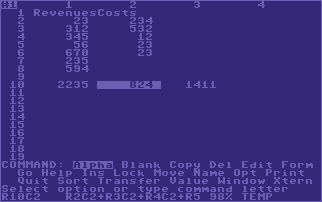
Believe it or not, the great-grandfather of Excel was released in 1982 by Microsoft itself. Very painstaking to use, absolutely the worst possible UX.

Multiplan on the C64
Wikipedia: Multiplan
Data Becker

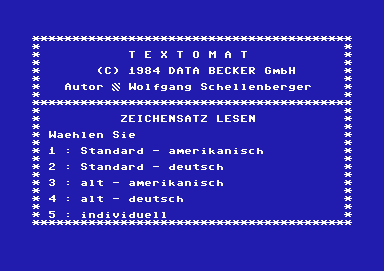
Once famous German publisher Data Becker had a series of office applications like Textomat, Datamat and other xyz-mat.

Source: c-64.online.com

Infamous also their books about any C64-related content, like programming and applications of all kind.

Cover der 3. überarbeiteten Auflage 1985
Source: c64-wiki.de
GeOS Commodore C64

Launched in 1986 (One year after Microsoft introduced Windows 1.0) Berkeley Softworks released GEOS (Graphic Environment Operating System). Don’t forget, this is a graphical OS on a 1Mhz 64kB 6502 processor! I specifically bought a mouse to use it. Fun facts: Nokia used it for their Communicator Series before switching to EPOC. Plus, the source code was reverse-engineered and made publicly available on Github.

GEOS for the Commodore 64
Wikipedia> GeOS
Sublogic Flight Simulator II

Anyone remembers the Flight Simulator 1 by Sublogic released in 1979 ? State-of-the-art at that time, looking at the hardware inside an Apple IIe, but a terrible flying experience in a wireframe landscape,.

Wikipedia: FS1 Flight Simulator

The sequel Flight Simulator II came with major improvements, colors and real-world sceneries. What a quantum leap that kept me flying for hours. Dont forget to look the glasses of someone living in the 80’s, if you compare this to the latest MS Flight Simulator, it looks like a joke.

Wikipedia: Flight Simulator II (Sublogic)

Other Home Computing Devices from the 80s

Many other home computing devices tried to conquer homes in the 80’s, most of them not even remotely as successful as Commodore.

Amstrad CPC 464, with CTM644 colour monitor
Wikipedia: Amstrad CPC
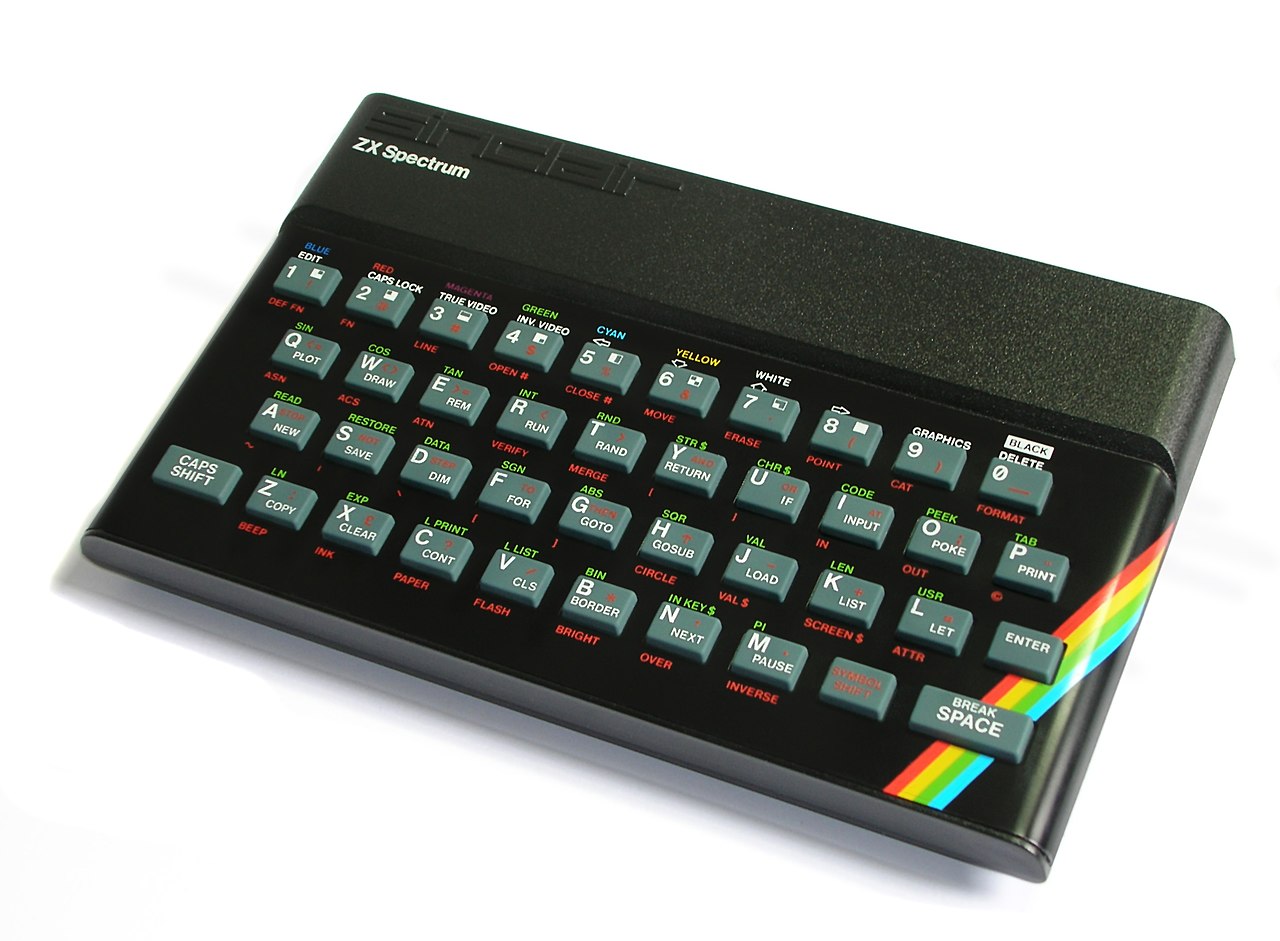
ZXSpectrum48k.jpg
Wikipedia: Sinclair Spectrum
Atari 1040STf.jpg
Wikipedia: Atari ST
Apple IIe.jpg
Wikipedia: Apple IIe

Conclusion

There is quite some excitement about old technology, mostly for sentimental reasons. It allows us to have a little time travel trip in the past. Sadly to say it won’t keep you entertained very long, the memories feel better than experiencing it again.

DIY Project: Create a Tracking App Part 1

The discussion about mobile phone location tracking of people and tracing back to potential transmissions is one of the hot topics at moment. In Germany we could expect an app officially being launched towards end of April. I attempt to go through the technical considerations by myself. A hands-on coding excursion with Android to use Bluetooth to scan nearby devices and exchange data with them.

The most basic requirements for a tracking app to be successful:

  • A person need to posses and carry a switched-on mobile (smart) phone.
  • The phone must have GPS and Bluetooth feature and both being enabled.
  • The location need to be recorded as fine-grain as possible. Use of GPS is mandatory, the celldata is way too coarse (see previous post). Though we might consider to skip location completely and rely on the paring of fingerprints solely, depending on the approach.
  • Approach 1: We record the location and time of a device (aka person) and transmit the data to a server immediately and try to match data with other devices on the server. Hard to implement in a GDPR compliant way and users most likely wont buy in.
  • Approach 2: We record the location and time on the device and any digital fingerprint of devices nearby. This anonymous pairings we transmit to the server. Once one device is flagged as infected, the server can flag any other device “paired” previously and push (or pull) a notification to the impacted devices. This way most data remains on the device. A more GDPR compliant way of solving this. Some details need to be worked out though in regards of matching and informing the respective user.
  • Approah 3: Even better if we could rely solely on the fingerprint of nearby devices and the timestamp.
  • The more user we have in the system, the bigger the impact and the chance to trace and inform and potentially stop spreading further.
  • We must have a mean to report an infection and inform affected other users (and still stay within the boundaries of GDPR).

Before walking into the Bluetooth space, some facts:

  • The not-for-profit organisation Bluetooth Special Interest Group (SIG) is responsible for thedevelopment of Bluetooth standards since 1998. (Wikipedia)
  • There is a regular update to the Bluetooth standard, by January this year SIG released version 5.2. It takes time for the hardware manufacturers to adopt the newer standards.
  • We need to distinguish between Bluetooth Classic and Bluetooth Low Energy (BLE). BLE was introduced with version 4 and supported by Android 4.3.
  • Bluetooth Classic is designed for continous short distance two-way data transfer at a speed of up to 5 Mbps (2.1 Mbps with Bluetooth 4). BLE was made to work with other devices at a lower speed and greater distance.
  • Android 8.0 onwards support Bluetooth 5 which is a significant milestone for Bluetooth technology in terms of range, speed and power consumption.
  • It is not possible to programmatically check the supported Bluetooth version in Android, though you can check if BLE is available on the phone.
  • The MAC address of the Bluetooth adapter is fixed and can’t be changed (except for rooted phones). This way it becomes the digital fingerprint.

Are we running out of MAC addresses ?

MAC addresses (used by ethernet, wifi and bluetooth adapters), as per IEEE 802 definition, have 48 bits (6×8 bytes).
Sample AC:07:5F:F8:2F:44
This would result in some 281 trillion (2^48) possible combinations, but the first 3 bytes are reserved to identify the hardware manufacturer. For above sample AC:07:5F it is Huawei. The remaining 3 bytes are used as unique identifier, resulting in only 16 million (2^24) unique devices. Quite likely this number would be used up more or less quickly by a big manufacturer. In reality we also could have 16 million unique manufacturer ID’s, Huawei owns about 600 of these, giving a total of currently 10 billion devices. We need to consider this numbers when we talk about unique fingerprints (MAC), though it is unlikely at a country level to have duplicates. In Germany we have ~83 million citizens and about 142 million mobile phones from different manufacturers, small chance that two persons (actually using the tracking app) will have the same MAC address.
You can check/download the identifiers here.

Lets get started with some coding..

Basic: Android to list paired devices

Before we jump into the more complex discovering, pairing and communication between devices (using threads,) we start with the basics. Lets enumerate the paired devices.

Required Permission

At minimum access to coarse location (since Android 6) is needed since Bluetooth can be used to derive the users location. I skip the code to request the permission, only location access being a critical permission. (complete code will be pusblished at the end).

<uses-permission android:name="android.permission.BLUETOOTH"/>
<uses-permission android:name="android.permission.BLUETOOTH_ADMIN"/>
<uses-permission android:name="android.permission.ACCESS_COARSE_LOCATION" />

Check and Activate Bluetooth Adapter

public class MainActivity extends AppCompatActivity {

    private static final String TAG = "bt.MainActivity";
    private BluetoothAdapter bAdapter = BluetoothAdapter.getDefaultAdapter();

    @Override
    protected void onCreate(Bundle savedInstanceState) {
        super.onCreate(savedInstanceState);
        setContentView(R.layout.activity_main);

        checkAndRequestPermissions();

        if(bAdapter==null){
            Log.i(TAG,"Bluetooth not supported.");
        } else {
            Log.i(TAG,"Bluetooth supported.");
			
	        if(bAdapter.isEnabled()){
				Log.i(TAG,"Bluetooth enabled.");
				if (!getPackageManager().hasSystemFeature(PackageManager.FEATURE_BLUETOOTH_LE))
					Log.i(TAG, "BLE not supported.");
				else
					Log.i(TAG, "BLE supported.");
			} else {
				Log.i(TAG,"Bluetooth not enabled.");
				startActivityForResult(new Intent(BluetoothAdapter.ACTION_REQUEST_ENABLE),1);
			}
        }
    }
..

List existing pairings

Quite simple to iterate through the existing pairings and list their name and MAC Address

private void showPairedDevices(){
	Set<BluetoothDevice> pairedDevices = bAdapter.getBondedDevices();
	if (pairedDevices.size() > 0) {
		for (BluetoothDevice device : pairedDevices) {
			String deviceName = device.getName();
			String deviceMAC = device.getAddress();
			Log.i(TAG,"Device: " + deviceName + "," + deviceMAC);
		}
	}
}
I/bt.MainActivity: Device: HUAWEI P20,AC:07:5F:XX:XX:XX
I/bt.MainActivity: Device: moto x4,0C:CB:85:XX:XX:XX

In the next post we will discover nearby Bluetooth devices and setting up a communication channel between two devices.

Stay tuned for more tracking..

References

Image by Brian Merrill from Pixabay

Hands-On Amazon Echo Dot and Alexa

Amazon Echo, the voice-controlled and hands-free device/speaker was already launched in the US in November 2014, now 2 years later the Echo, and the Echo Dot second generation, is available in Europe. In Germany it was soft-launched in late October on an invitation base at Euro 59.99, the bigger Echo at Euro 179.-.

Amazon Echo Dot

Amazon Echo Dot

Curious enough about having a glimpse into our household and workplace (?) future I requested one and got it delivered last week Friday. At the size of a hockey puck, the device contains 7 microphones, a simple loudspeaker, WLAN and Bluetooth connectivity. No battery, so the Echo must be connected to a USB power adapter at all times. I must admit, the idea of having a “spy” device with microphones permanently listening into my room brings up some privacy concerns, though Amazon claims only the keyword (Alexa, Echo or Amazon) is activating the device, it’s LED ring starts to turn blue, and the spoken commands get transferred to the Amazon cloud, using the Alexa Voice Recognition Service, on which Amazon supposedly spend a 100 million dollars.

Amazon Echo Dot

Amazon Echo Dot

Here a first hands-on experience resume:

Being an Amazon user with a Prime account and already a Kindle and a Fire HD tablet at home, the setup takes less than 5 minutes, inclusive of setting up a WLAN connection from the Alexa App to the device, preparing the WLAN access from the device to your AP and connecting it via Bluetooth to the home theater system. The device is woken up with the keyword or by pressing one of the four buttons on top of it, followed by your question or command.

It does not run a conversational model in the basic use cases, though the skill sets support sessions ! You raise a question or trigger a command, that’s it. It wont ask back (yet). It will respond with the right answer or execute what you have asked for, or respond it if it does not understand you, sometimes it wont do anything at all after activation other than showing the blue ring (maybe due to noisy environment). The basic services available are rather simple or move around the Amazon product landscape, most prominently playing music on demand from the Amazon Prime Music offerings, ordering products from Amazon or responding with the weather info or respond to simple Wikipedia style questions. The power of the device is unfolding with the skill-sets that allow third parties to offer services based on the Alexa services. This can be house-automation, ordering pizzas and other consumer services. Being a regional feature there are about 3,000 skills available in the US but only about 2 dozens in Germany at the time of writing.

My kids had a Sunday afternoon fun time to play with it and trying to fool with it, though at this stage it wears out pretty fast after hearing “I don’t understand your request” and similar responses if you leave its pre-programmed comfort zone (it is interesting to observe how kids approach such a device). Be aware of the Eliza Effect using a device with a synthetic voice and human-like response.

What makes it particularly interesting to me is the evaluation of a completely voice based service and the platforms extensibility through the Alex Skill Set and the API’s that Amazon provides. You find lots of information at the Amazon developer portal and you can even join the Mashup Contest.

In short, right now it is still a toy but with lots of opportunities to come up in the near future. I will look at the potential use cases in a aviation environment, both operational and as passenger and keep you posted.

Amazon Echo Dot

Amazon Echo Dot

While using the Echo I feel a bit like talking to Hal 9000 in the 1968 film “2001: A Space Odyssey” directed by Stanley Kubrick. Echo does not yet have an attitude.

Hardware Hands-On

You have little chance today to get your hands dirty with electronics or computer hardware, either we deal with small devices like mobile phones, tablet and notebooks which are not made to be opened and tinkered with or our hardware is virtual only and sits in the cloud (no screwdriver required). Few people now still own a desktop size PC where one can add or change hardware (major hardware companies claiming massive loss due to dropping sales in this market).
During my studies in the 90’s we still dealt with CPU’s at a very low level which helped to ‘see’ and understand what’s going on.

If time allows I am doing some DIY  projects with Arduino or Raspberry Pi, 2 electronic platforms which seam to be similar at the first glance, but operating very differently.

The Arduino is a progammable microcontroller, designed to work with sensors or to control external components like relays or motors. Is a very hardware oriented device, no OS or whatsoever included. It does basically what you program it to do. More info and getting started at http://arduino.cc

Arduino

Arduino

The Raspberry Pi on the opposite end is rather a miniature computer, running an OS from a SD card and equipped with ethernet, HDMI and USB plugs. It is clearly more a software platform which can be used for more powerful applications than the Arduino. More info and getting started at http://www.raspberrypi.org

You have the option to combine both, to have processing power of a computer and the myriad of inputs and outputs to the real physcial world.

Raspberry Pi

Raspberry Pi

Crowdfunding Projects I back (2)

Another small project I backed is the Gamebuino, an Arduino based retro game console. Simple concept to pick up basic game programming with this 8bit gadget that reminds me of the Gameboy that Nintendo launched in April 1989. Amazing, the one-man project managed to gather 1.000% of the funding he asked for. The device was funded for 25$ as early bird backer.

Hardware History Lane – Casio Cassiopeia

Over the years we spend a lot of money into gadgets and electronics, only to see its value dropping to zero and being out-dated the moment you open the box the first time. While doing some spring cleaning I unearthed the  Casio Cassiopeia that I bought in 2001 (for ~800.- DM) , surprisingly it still charges and works.

Casio Cassiopeia

Casio Cassiopeia EM-500G

This is EM-500G, a slimmed down version of the E-125. Some specs:

  • CPU: NEC VR4122 MIPS (150 MHz)
  • Memory: 16 MB ROM
  • Display: LCD, 240 × 320 Pixel, 65536 Farben
  • Interfaces: Seriell/USB and IrDA
  • MultimediaCard Slot
  • Windows Poecket PC 3.0

Compared to todays mobile phone and tablet hardware seems like nothing (vs. eg. a dual-core 1.7 GHz and 2GB of a Samsung Sx phone).
I am just wondering what we gain in 13 year with CPU speed times 10 and memory times 100 from a user point of view ? Yes, we have Android and iOS with 1.000.000 applications to download, 3D Games on HD screens, music and videos (the Cassiopeia  can handle that too to some extent), but the basic features are still the same. I used the Cassiopeia that time to remote dial in into Unix servers, using a Siemens S35 as modem.

Casio Cassiopeia EM-500G

Links:

Crowdfunding Projects I back

Crowdfunding becomes more and more popular with many successful projects coming out of the various platforms in the web (most Kickstarter and IndieGoGo). I like the idea of independent smart people coming up with an idea and let a product or concept take off without backing by a huge MNC (though these companies might buy a crowfunded project and turn off supporters, but that is another story). I believe crowdfunding can be a source of genuine products which are not made solely to hog patents and increase shareholder values.

Doing panoramic and spherical photography for more than 15 years now, I am excited about the new ideas, technologies and products coming up.
Sometimes you should follow your ideas or visions, I did some basic research for an own panorama rig similar to the projects below back in 2007 (link), but did not really complete the project and with the requirement to export the images and stitch them in the PC it was not very practical. In 2007 I did not see the option to stitch with hardware on-board.

One already successful funded project is the Panono Camera Ball (a camera in the shape of a ball thrown into the air to snap an full spherical images with 36 small cameras built-in).


2 new projects that are still in the funding phase I back with 300 U$ each. Both try to create 360 degree images and videos

The CentrCam
At the time of writing the project still have to fund another 360.000 U$ in 6 days, seems to become unlikely being successful.


The 360Cam
which is already 280% founded.


Lets see who makes the race (they are not competing I guess) but is a bit strange that the 360Cam has a target of 150.000 $ only, with a much richer feature and quality list compared to the 900.000$ target of the CentrCam that would output video in a lower quality and smaller resolution. Anyway lets wait for the funding results, I am happy to support both (at least I add both to my panorama collection).